Creating and Managing Contract Items
The Product Information Management System enables Suppliers to load products into their Marketplace and create and view Catalogs (or containers) from the loaded product lists.
The purpose of Marketplace is to provide a list of available products through a Catalog ordering experience for Government Agencies to optimize the purchasing of their procurement needs directly accessible from within their procurement software. Catalogs created by Suppliers are placed into a Public Arena where everyone can look and search through the available products.
Login
MarketPlace is accessible by logging into ePRO and accessing Marketplace Administration from the "Settings."
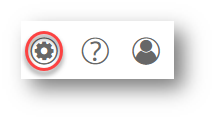
STEP 1: Open the Settings Icon (Gear Icon) in the upper right-hand corner
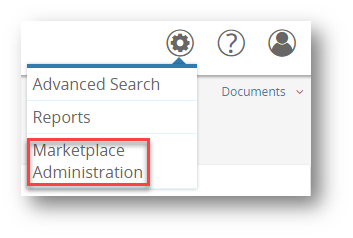
STEP 2: Select Marketplace Administration in the dropdown window
MarketPlace is now available to the Marketplace Administrator in a new browser window or tab.
Please Note: The User’s popup blocker must be disabled when accessing MarketPlace.
Special Note: Only an Agency ePRO Administrator or Supplier Administrator for the ePRO customer with whom a Vendor is registered can provide access to Marketplace Administration for the Vendor.
Main Menu
STEP 1: Understanding the layout and flow of the homepage
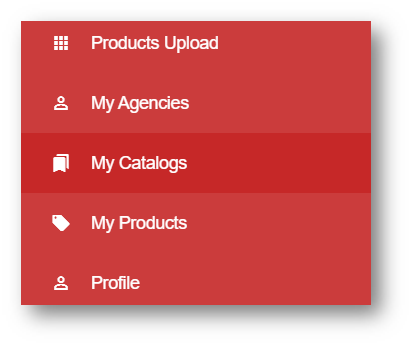
The initial login directly accesses the "My Catalogs" page where, once a catalog has been saved, users can edit the price and deactivate catalogs. This section also provides quick data to define or classify the types of products contained within. Users can also select any section within the "Supplier Navigations" on the left.
The purpose of the Main Menu left-side navigation is to provide links to the various actions available when creating and navigating public catalog(s). The user can select any menu item regardless of previous actions or saved status of products and catalogs.
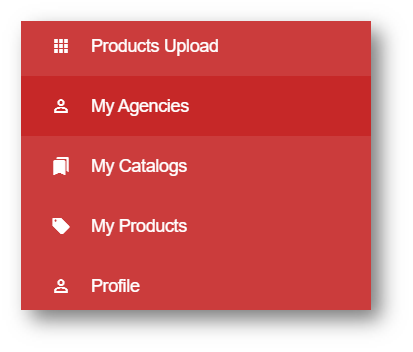
From the "My Agencies" section, users can confirm which agencies have chosen to use any active catalogs and adjust pricing for individual agencies if providing discounts.
The "My Products" section is not for taking actions about products or catalogs but operates as a composite list about the products which have been created/uploaded into the Marketplace.
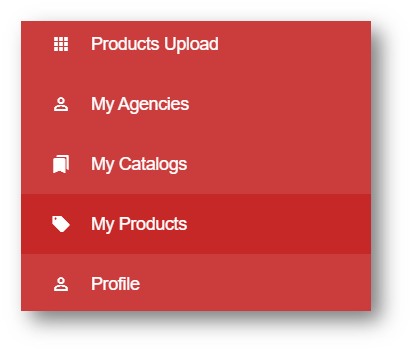
The last section, "Profile," provides access for users to include Company information directly within the Marketplace, such as physical address, email address, phone number, company logos, and confirm a link to other Periscope Holdings accounts.
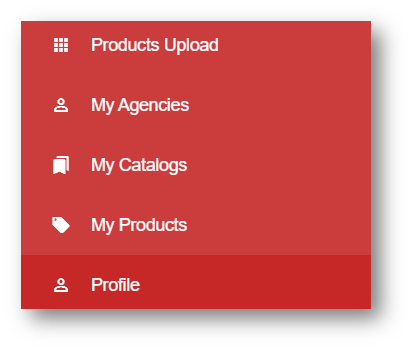
Before accessing the other features below "Products Upload" (which require a catalog to be effective), to begin the process, start with the first step to add a product, which must be completed before being able to create a catalog.
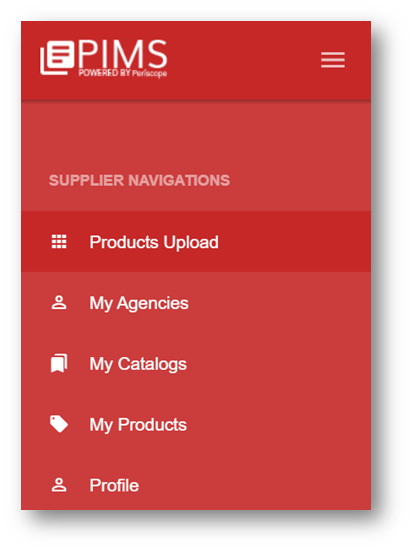
Minimize the Main Menu by selecting the right-hand section or click again to pin the menu open:

The "Products Upload" page accesses a Status Indicator for previously (if any) created product lists (called "tasks").
Products Upload Status Page
Each section of the Status Page under "Products Upload" provides different information about the product lists successfully uploaded into the Marketplace:
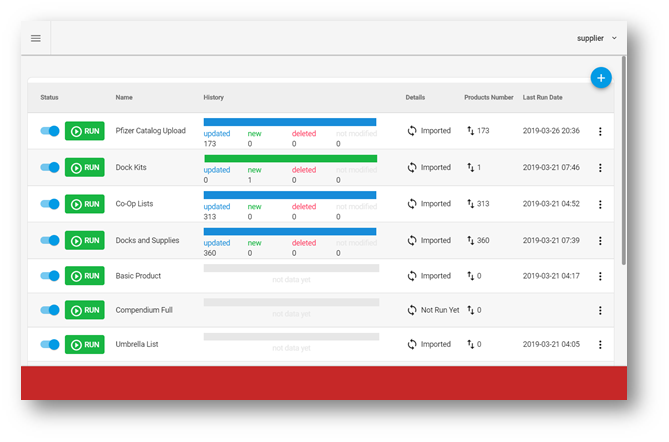
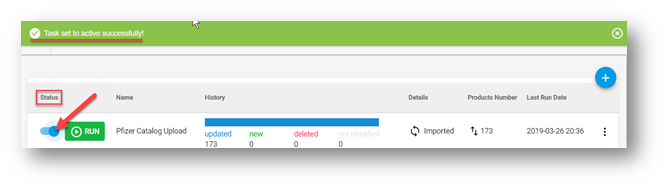
Activate or deactivate specific product(s) ("tasks") using the slide option (a confirmation is posted at the top).
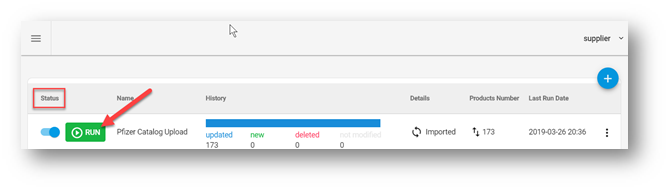
Initiate "Run" to upload the product list (or changes made to it).
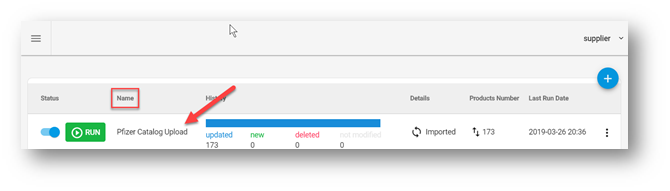
A display of the product list (task) name.
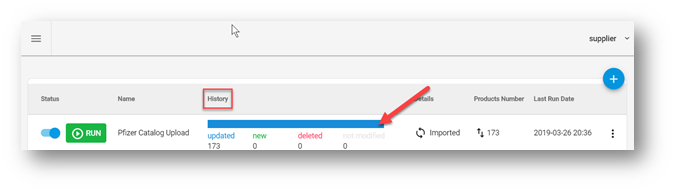
Historical data based on the most recent running to capture changes to the product list, including updates to previously loaded products, new products, or the number of products removed from the list.
A confirmation status with clickable redo link to return to the final stage of the creation process.
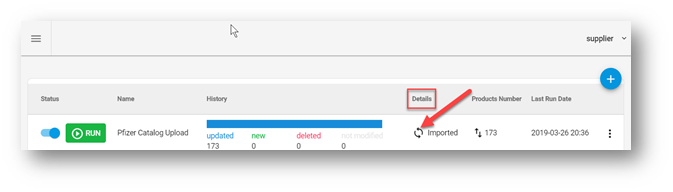
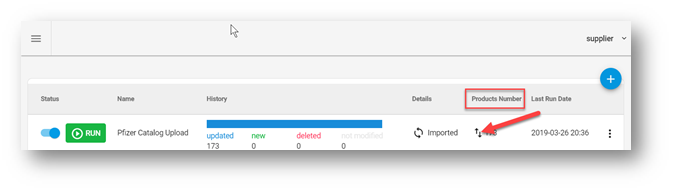
A confirmation number of the amount of products impacted from the most recent run with clickable up/down link to return to the final stage of the creation process.
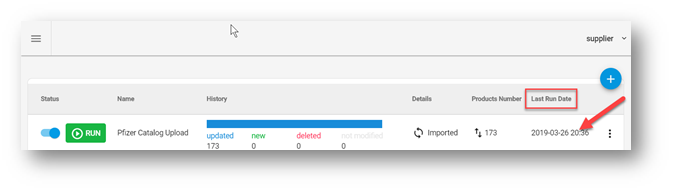
The date and time (24 hour clock) of the last time the catalog was run.
|
Field Name |
Field Description |
Field Implication |
Recommended Usage |
|
Status |
Determining whether the Task (Product File) is active/ available to link to a Catalog |
Active Tasks (Product Files) are available to select on the Catalog Editor page, under the “Task” section; Inactive Tasks (Product Files) are not visible to select on the Catalog Editor page, under the “Task” section |
Activate Tasks (Product Files) when creating the Catalog; Leave inactive if the Catalog for that Task (Product File) has not been created so other Marketplace Admins do not select the Task (Product File) for one of their Catalogs; Tasks (Product Files) can only be linked to one Catalog at a time |
|
Name |
Title of the Task (Product File) |
The Name of the Task (Product File) displays on the Products Upload tab and Catalog Editor screen, under the section “Tasks” |
Name the Task (Product File) that best describes the Products available in the Product File |
|
History |
Documents modifications to the Task (Product File) |
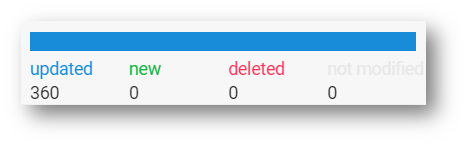
New – Displays the number of new Products added to the Task Updated – Displays the number of Products that have been updated in the current Task Deleted – Displays the number of Products deleted from the current Task Not Modified – Displays the number of Products not modified when Task was modified |
Select the History Bar on the correct Task to view the Task History |
|
Details |
Confirms successfully completed running of task |
Quicklink to access final stage of Task creation |
N/A |
|
Products Number |
Displays the total number of Products in the Task |
This number changes based on modifications to the Task |
N/A |
|
Last Run Date |
The Date when the Task was last run/ products were uploaded |
Selecting the “Run” button changes the date |
N/A |
Product setup and mapping into Periscope Marketplace
In order to most efficiently upload products into the Marketplace, some initial file preparation is appropriate to prepare compatibility for the system to seamlessly import product information.
The following two sections will cover adding products to prepare a new Catalog or to make updates to an existing product list using a .csv file. XML or JSON uploads may also be executed, if preferred.
The purpose of adding products to a Catalog is to allow Suppliers to provide government agencies a shopping place to meet their procurement needs.
Preparing a .CSV file
STEP 1: Fill in Product Information into an empty spreadsheet
The .csv file is not dependent on column numbers or field names. It is open to however many is necessary to the product and the naming convention appropriate to the industry. Empty columns will not work. There is, however, an at minimum requirement, which is at least three (3) column fields for a basic product: id, title, and price.
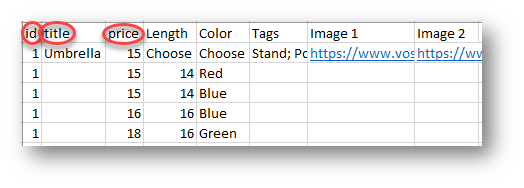
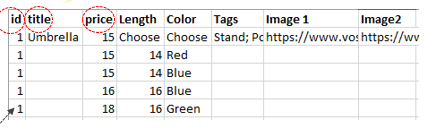
When building options into a product, the main product information is stored on the first line, and then each option duplicates the id number. When the id number changes, it will be considered as a separate product rather than variations of the same one.
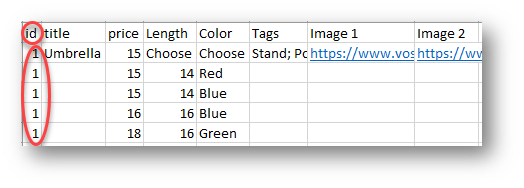
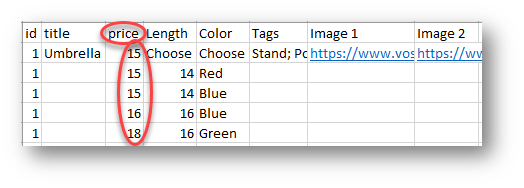
Including prices allows the Marketplace tool to update cost and adjust based on added quantities or changed based on options. If an option is a different price than the original product, the new price should be included (NOT the difference in price).
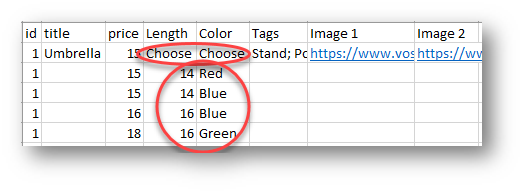
It is not necessary to use an indicator word (e.g. "choose") in the column that includes the other options for a product. A risk is that the first option included ("choose" in this instance) is a selectable option and would continue all the way through purchasing the product. The information passed to the Supplier would leave the option as "choose" and therefore be unknown.
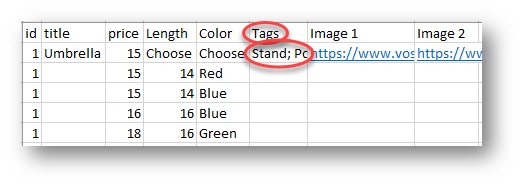
An optional field is "Tags", which helps the Catalog search function index your item. Multiple tags are allowed, which can be delimited with a space or comma, but a semi-colon followed by a space is recommended. In a .csv file, the comma can get confused with the other delimited column fields and accidentally create a new column.
When referencing images, the system does not load or store images. It connects to an image library tied to a specific URL with the .jpg file extension included (e.g. www.mypictures.com/umbrella.jpg; a .png does not work) at the end.
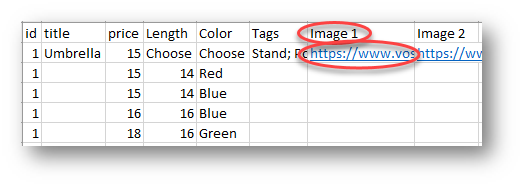
While this only displays a few field options, anything that designates a different product (even if the same kind of item, just from different manufacturers) should use separate id numbers and then a correlating column and name to include that information in the product description when it's uploaded to a catalog.
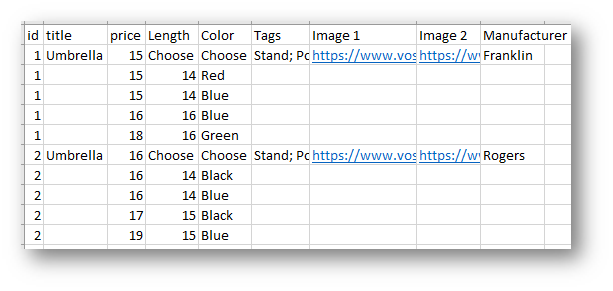
In any field, if using a carriage return or line break, the import feature still interprets those correctly within the same column and field. For example, if my column name was "title 2" and unseen in my spreadsheet display, title 2 is successfully imported as part of the product description. However, all rows need to be formatted the same (i.e. no merged cells).
STEP 2: Save as… a .csv File
Creating New Task for Product File
Follow each step to upload a product list by importing a .csv file.
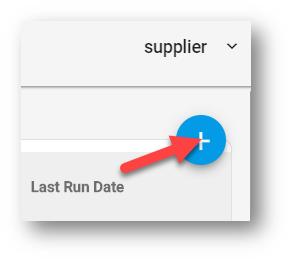
STEP 1: Select the Plus (+) button in the top right corner to create a new task
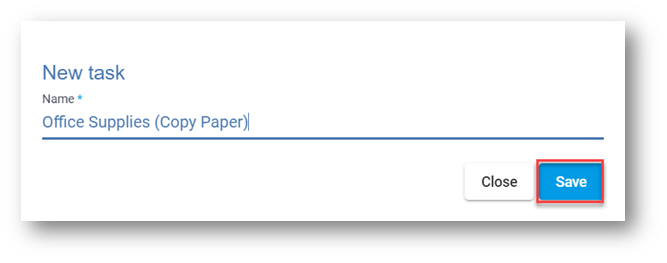
STEP 2: Enter the Name of the Product File
The Product File contains all the Products that are being uploaded into MarketPlace.
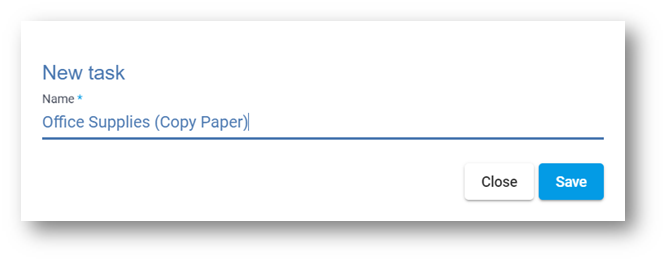
STEP 3: Select the Save button
The Marketplace Admin can now upload Products that are saved on a local computer.
STEP 4: Select the Plus (+) button to Add New File

STEP 5: Select the Connection Type
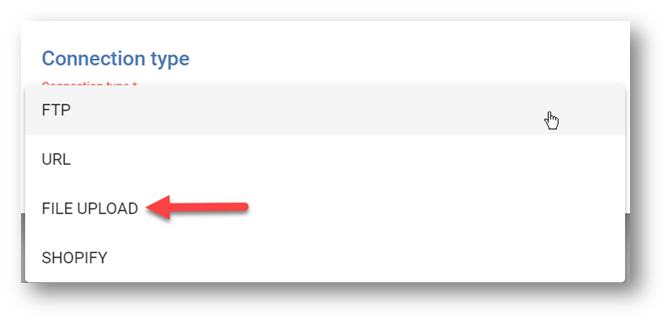
In order for the Marketplace to connect and transfer file information, the system must be told how and where to copy the file. Open the drop-down menu and select the preferred file type which can be formatted as a .CSV, JSON, or .XML file.
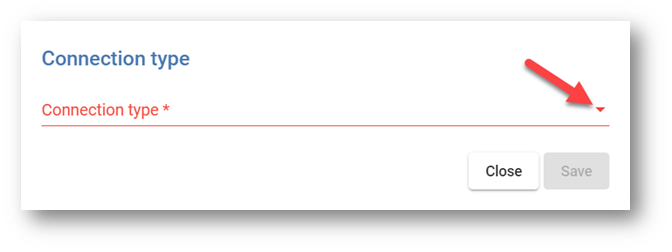
The URL or FTP options can be used with an .XML or JSON file. If operating a Shopify site, choose that option and indicate so the Marketplace will sync the products already established. To import a .csv file into the system, choose "File Upload" to pull from a local computer.
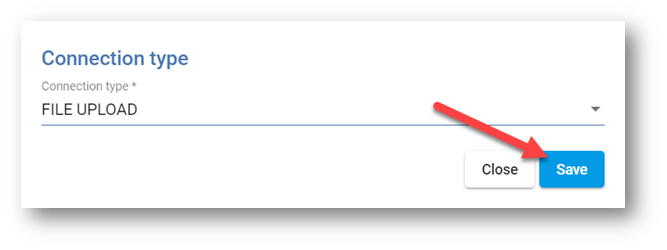
STEP 6: Select the Save Button
The Connection type is now saved.
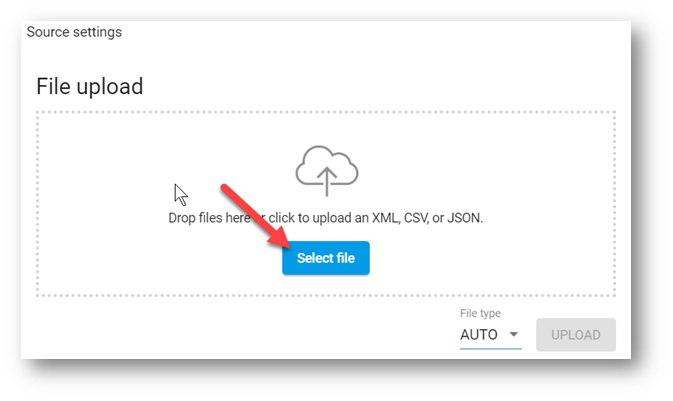
STEP 7: Select the Select File button
This allows the Marketplace Admin to open up and search through files stored on a local computer to select the file that contains the Product List.
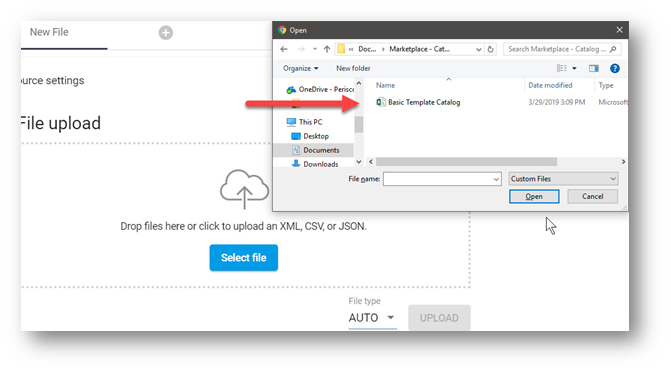
Any compatible files of JSON, .XML, or .CSV will appear in the available list. Select the appropriate file.
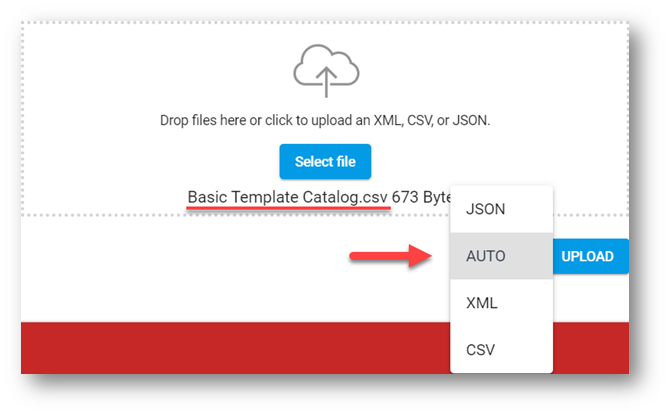
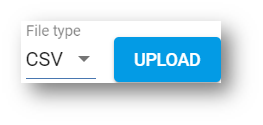
Verify the file name in the "File upload" section. The Marketplace defaults to "AUTO" to determine the type of file being uploaded. If desired, indicate the type by selecting it from the available dropdown list. Most of the time, the system will successfully determine the file automatically, so leave it as default.
STEP 8: Select the Upload button
The Product File is now uploaded into MarketPlace.
A new "Settings" panel appears on the right to designate specific characteristics about the file, such as Delimiter type (Comma; Semi-colons; Tabs; Pipes; or Carets), Enclosure (Double quotes; Quote), and End of Line (CRLF; CR; or LF). By default, the system will attempt to automatically detect how the original file was created.
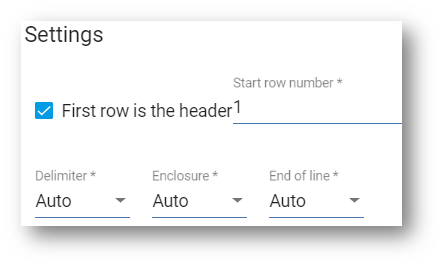
If not using headers in the first row of the Product List file, deselect the checkbox and indicate the row number on which product information starts. Typically, the defaults will successfully determine how the file is built.
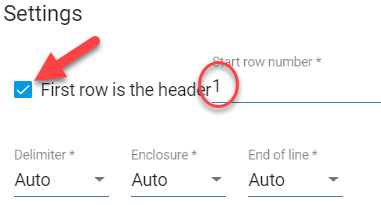
STEP 9: Select the Save button in the bottom right-hand corner
The Marketplace Admin can now map the Columns in the Product File to the MarketPlace fields.
Map Column Headers in the Product File to the correct MarketPlace Fields
The next section to import product information focuses on mapping the available product fields by pulling production information directly from the Product file or can be manually entered. How information is mapped determines how Products display to Shoppers in the Marketplace.
Please Note: Additional Columns (besides Id, Title, and Price) are available while building out Products. Other notes of usage:
- Fields from your source file can be used multiple times within multiple MarketPlace fields.
- Placing 2 or more fields together will concatenate fields. If separation of fields is preferred, use any punctuation or spaces that will clarify your content/data.
- The “Product Description” field will utilize html coding for a nice display for the shopper. The following code works nicely:
- <br> - To have a line break, or to place content on a new line. Use it twice for a double space.
- <a href=”url.com”>LinkVanityName</a> - to place a link in the description.
- To create a bulleted list:
<ul>
<li>FirstLineContent</li>
<li>NextLineContentEtc.</li>
</ul>
- Anything placed in the “Tag” field will be available as a filter for the shopper. Make sure to use the “plus” icon to add multiple tags.
- To show immediate discount, place the listed price in the “MSRP” field. Then the discount price in the “Price” field.
- Options – Your product can have options, also known as “variants” or “attributes”. At this time, your file must be built with options as a single file. All options must have the same unique identifier as the main product they are describing. Each option must equal the total price of main product plus the additional cost of the option. Example below shows an umbrella with various options and prices:
- Direct text - typed text can be used as additional content or the only content of a field
- Data file cleanliness - the uploaded data file must be clean. For .CSV file, non-standard ASCII characters are not allowed. Products such as Notepad++ can assist with cleaning files. Empty columns without column names (between columns with data) are not allowed.
- Images - images are not stored, just a reference to a URL. The url must end with “.jpg”.
STEP 1: Fill Out Product Information
To the right, the information pulled from the Product file displays and can be inserted into the product fields by clicking on an item and dragging it over to the fields on the left.
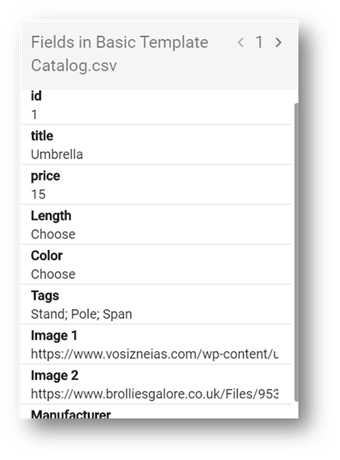
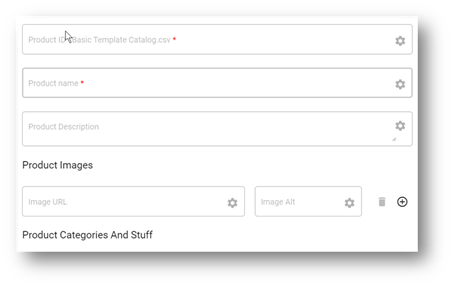
On the left, the available fields in the Marketplace that are available for the Shopper display. Scroll down to see the full list. Only three (3) items are required: Product ID, Product Name, and Price.
Begin filling out information by clicking and dragging items from the right-hand side over to the appropriate field on the left-hand side.
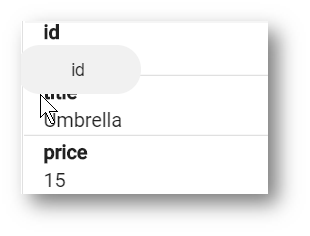
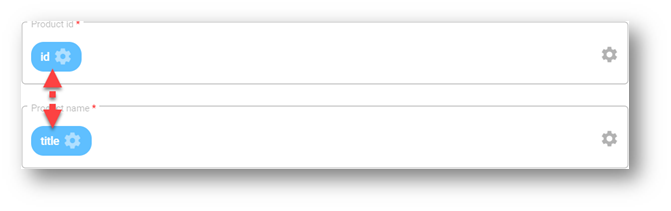
Release the dragged item in the appropriate field.
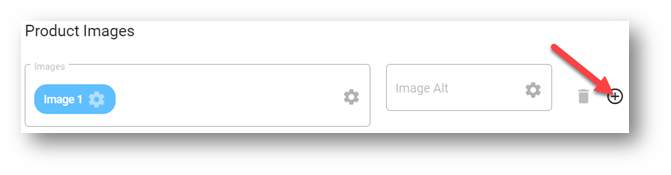
Product images offer a primary location to pull from and an alternative if the primary server hosting the image goes offline. The "Image Alt" is not used for multiple images. Select the "Plus" (+) sign to the left to add more than one image.
When providing multiple options on one product, scroll down to "Product Attributes" to enter those details in. Manually type in the "Key" field the name of the options, then using the click and drag from the Product file, move the list of options over into the "Value" field. Again, use the "Plus" (+) to add all information for variations.
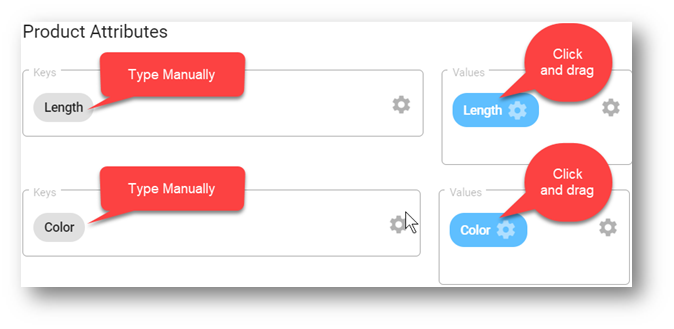
Information not included in the original file upload can still be entered by typing it in manually.
Field mapping only needs to be done for the column headers in a Product file but not for individual products. The products will then autoload into the list based on what's included and mapped from the original file.
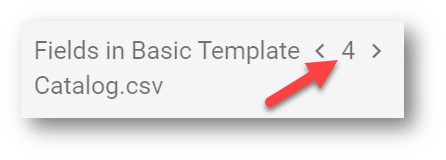
If you are unsure of data in your source field and want to see a preview of the data in a specific column, navigate back to the top right-hand corner to to view the data. The number displayed indicates which row from the spreadsheet is being shown.
STEP 2: Select the Save and Next button located at the bottom of the screen
The actions are saved and ready for the "Scheduler" section of the task.
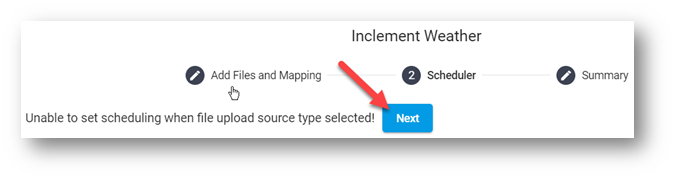
STEP 3: Select the Next Button
The purpose of scheduling is to provide the option to automatically run an update for files pulled from an FTP or URL. Uploaded files, such as a .CSV, can only be run manually each time to make updates to it, so the schedule feature is not applicable.
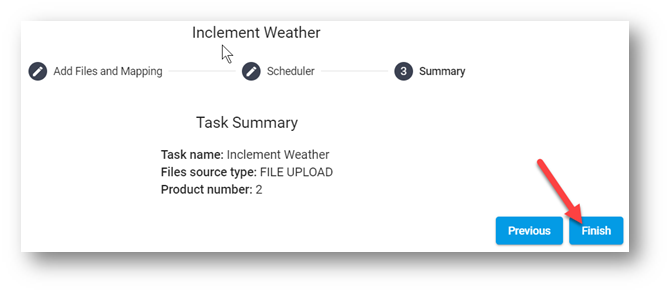
STEP 2: Select the Finish button
The Task Summary confirms the name of the product list (task), the file source (FTP, URL, Upload), and the number of products. Once finished, the Product Mapping is successfully saved into MarketPlace.
Run the New Task to Upload Products into MarketPlace
To complete the upload process and import the Products into MarketPlace, the task has to formally "Run" in order to pull all the details and save them in the system. When uploading from a local computer, the Run needs to be initiated from the same machine.
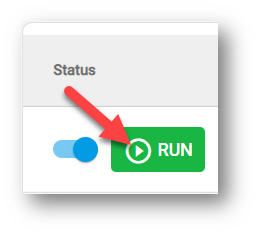
STEP 1: Select the Run button
Selecting the Run button allows all Products in the Product File to be available to add to a new or existing ("current") Catalog. Verify that the Status bar is to the right, then click "Run".
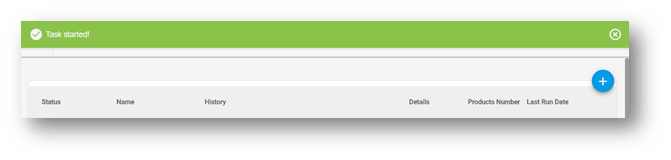
While in progress, a confirmation message will display at the top of the screen.
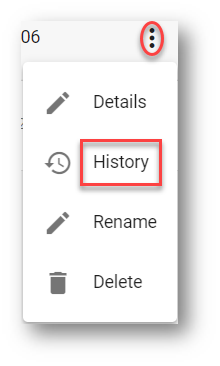
The "History" section displays the activity from the most recent run confirming the number of updated, new, or deleted products.
Modifying an Existing Product File in a Task
Product updates do not need to repeat these initial steps to get product information into the Marketplace system. Simply reupload the file and run it again. The mapping stays the same. The modifications can range from updating current Products, deleting current Products, or adding additional Products.
When adding or deleting products, this still starts with the file upload. All new fields in the source file have to be mapped. If adding a new name to an already mapped field, Marketplace will not recognize it.
Once updated, saved, and the new task has been run, the products are automatically available to the catalog. The catalog doesn't need a refresh as the entire system is able to sync up to recognize the changes. Reminder, because a .CSV file is coming from a local computer, the reschedule option is unavailable. JSON and .XML can be scheduled to run on a consistent basis.
STEP 1: Select the Product List (task) to Update
There are two ways to return into a previously uploaded product list. The first is completed by clicking anywhere to the right of the "Status" and "Run" options (e.g. "Name", "History", "Details", "Products Number", "Last Run Date"). The second is available by first opening the sub-menu to the very right contained within the 3 bulleted dots.
STEP 2: Select Details in the popup window
This opens the Summary page of the selected Task.
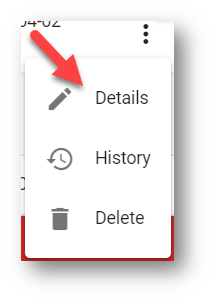
Opening the "Details" defaults to the last stage completed when creating a product list (task). Click on any of the "Edit" options to return to that section.
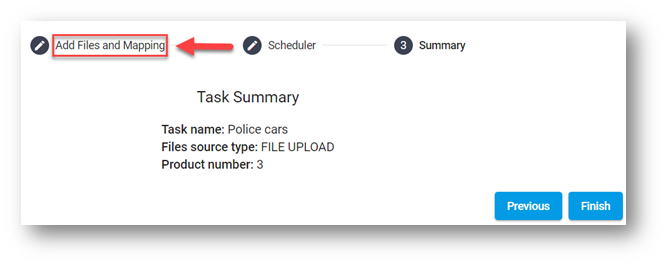
STEP 3: Select the Add Files and Mapping page
Returns to the MarketPlace Mapping page.
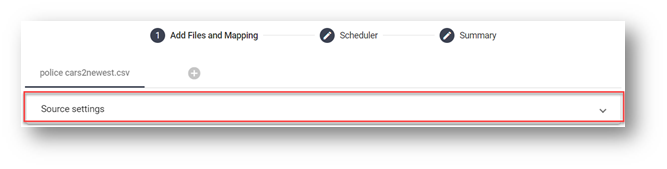
STEP 4: Select the Source Settings bar
The window will expand, allowing the .CSV File that contains the Product updates to be selected from the hard drive of their computer. Special Note: When uploading the updated .CSV file, make certain to click "Source settings" to keep the same mapping history and not the "plus (+)" button (which starts a new file). Then proceed to reload and complete the updated file.
STEP 5: Select the Select File button
A window will display, allowing the Marketplace Admin to locate the updated Product File.
STEP 6: Select the updated Product File
STEP 7: Select the Upload button
Make sure the new/updated file has the same column names and column order as the original file. At this point, only records should be updated, or columns added to the end of the file. The updated Product File will overwrite the previously saved Product File.
STEP 8: Select the Save button
A message saying, “Save File Settings was successful” will appear.
STEP 9: Scroll to the bottom of the screen
STEP 10: Select the Save and Next button
The Marketplace Admin is directed to the “Scheduler” page.
STEP 11: Select the Next button
The Marketplace Admin is directed to the “Summary” page.
STEP 12: Select the Finish button
The Marketplace Admin is directed to the Products Upload tab.
STEP 13: Select the Run button to the updated Task
Selecting the “Run”button which uploads the updated product file, and updated products are immediately available to Shoppers in the Marketplace (if the product has been associated to a catalog, and catalog is active for shopping.
Deleting Product Lists from Marketplace
Delete Products from Marketplace by deleting the Task on the “Product Uploads” tab.
STEP 1: Select the 3 Bulleted Icon on the Task that needs to be deleted
STEP 2: Select Details in the popup window
The Task will immediately be deleted, and all the Products and Catalog will be removed from the Marketplace.
Adding Additional Products to an existing Task
Before adding new Products to the Marketplace, new Products need to be added to the Source File (JSON, .CSV, .XML File) that was originally uploaded in the existing Task.
Each new Product that is added to the Source File needs to have a Unique Id. When the updated Source File is re-uploaded to an existing Task, MarketPlace recognizes the pre-existing Products and only adds the new Products and keeps the existing Products as they already are. Essentially, each time a Task is re-run, it only updates the differences of the previous run, either by removing, adding, or updating products.
STEP 1: Select the 3 Bulleted Icon on the Task that needs to be updated
Or select the Name of the Task that needs to be updated.
STEP 2: Select Details in the popup window
Now directed to the Summary page of the selected Task.
STEP 3: Select the Add Files and Mapping page
Re-opens the MarketPlace Mapping Page, displaying the first line of data in the current Product File.
STEP 4: Select the Source Settings bar
The window expands, allowing selections from the CSV File that contains both the current and new Products from the hard drive of the locally connected computer. Follow the same rules as outlined at the beginning of this section.
STEP 5: Select the Select File button
A window displays to locate the updated Product File.
STEP 6: Select the updated Product File
STEP 7: Select the Upload button
The updated Product File will overwrite the previously saved Product File.
STEP 8: Select the Save button
A message saying, “Save File Settings was successful” will appear.
STEP 9: Scroll to the bottom of the screen
STEP 10: Select the Save and Next button
Opens the “Scheduler” page (only applicable to JSON or .XML files).
STEP 11: Select the Next button
Review the “Summary” page.
STEP 12: Select the Finish button
Returns to the Products Upload tab.
STEP 13: Select the Run button on the updated Task
Selecting the “Run” button will make all the Products on the updated Product File available to the Shoppers in the Marketplace.
Renaming tasks
The Marketplace Admin can rename Tasks.
STEP 1: Select the 3 Bulleted Icon on the Task that needs to be renamed
STEP 2: Select Rename in the popup window
The Rename Task window will appear.
STEP 3: Enter the new name of the Task in the Name field
STEP 4: Select the Save button
The Rename Task window will close, and the new name will appear on the Task.
Create a catalog to publish in marketplace
Uploading a product list alone is not enough to create access to it for purchase in the Marketplace. A catalog is a container for products and, when created, provides access to products within. A Supplier created catalog is placed into a public arena where everyone in the Marketplace can use it to search for products.
The following section covers creating a Catalog and adding products to prepare the new Catalog.
The purpose of adding products to a Catalog is to allow Suppliers to provide government agencies a shopping place to meet their procurement needs.
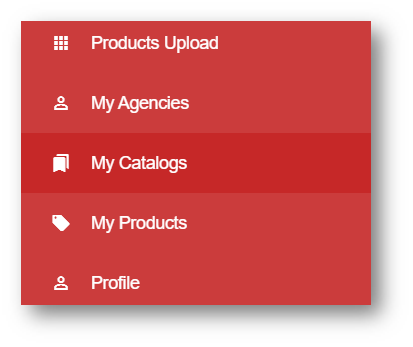
STEP 1: Access "My Catalogs" From the Side Menu
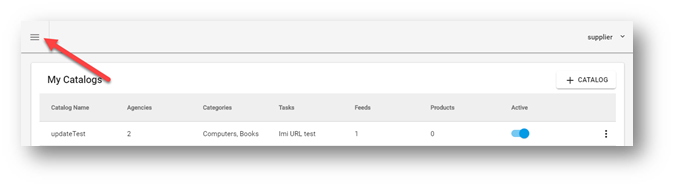
Open the left-hand side menu in the upper left-hand corner and select "My Catalogs" from the available list.
STEP 2: Understand the layout and flow of My Catalogs
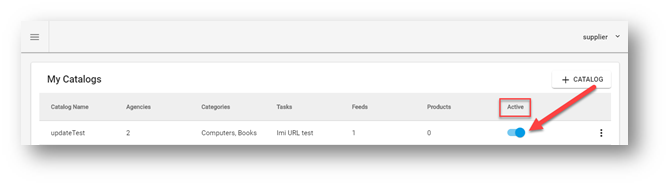
Accessing "My Catalogs" from the menu opens the Status Page for previously (if any) created catalogs.
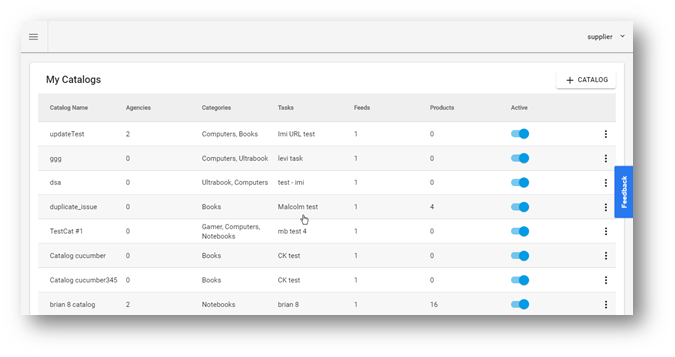
Access the menu using the icon in the upper left-hand corner.
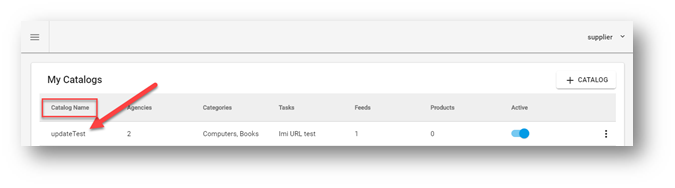
The "Catalog Name" Confirms the Name of a Catalog.
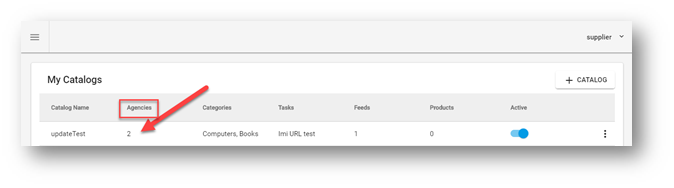
"Agencies" Displays how many agencies are currently using a Catalog.
"Catagories" Lists the chosen categories that define a Catalog.
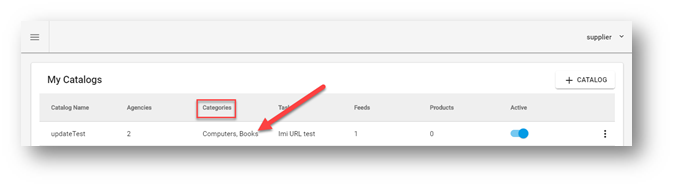
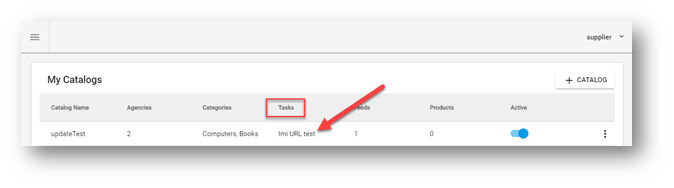
"Tasks" Confirms the product lists (tasks) contained within a Catalog.
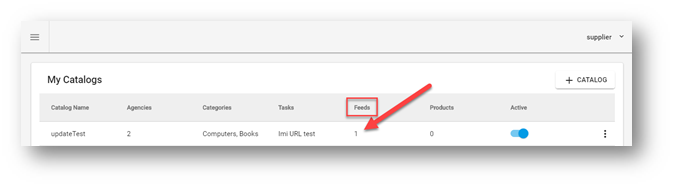
"Feeds" Confirms how many product lists (tasks = Feeds) are loaded into the Catalog.
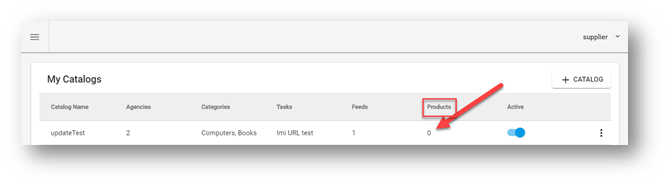
"Products" Totals the number of products from all product lists (tasks).
Activate or deactivate a Catalog using the slide option (a confirmation message is posted at the top of the page).
Creating a Catalog
STEP 1: Select the Plus (+) Catalog button

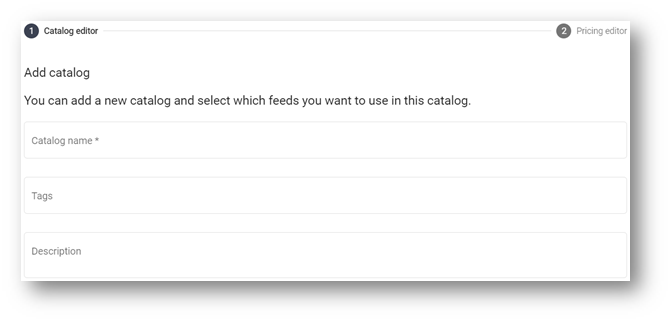
STEP 2: Type the name of the Catalog in the Catalog Name field. Make sure it is a recognizable name for ease of shopping, i.e. “ACME Co – Steel Truss Products”. It is good to use your Company Name as the leading text to generate a brand for your catalog.
STEP 3: Select the appropriate Category associated to the Catalog
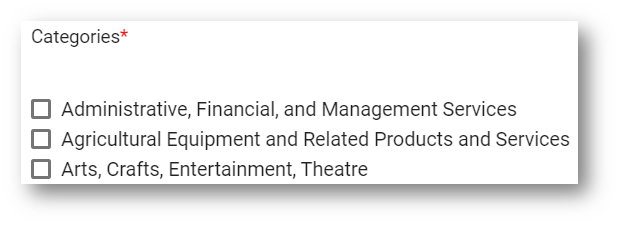
Use Categories to identify, in a general way, the types of products within the catalog. If you believe a Category is missing, notify Periscope and we can add more for you.
STEP 4: Select the appropriate Catalog Type associated to the Catalog
There are two Catalog types to indicate what's being sold: Products or Services.

STEP 5: Select the Product File under the Tasks section to tie to the Catalog
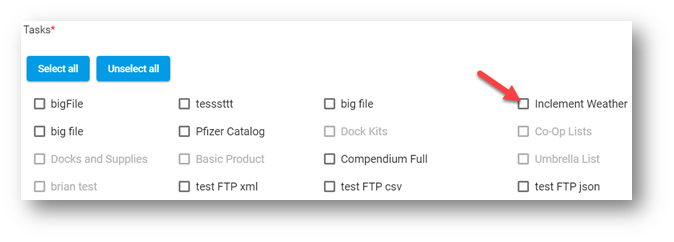
The "Tasks" section provides all created and available product lists as managed on the "Products Upload" page. Lists that are inactive are grayed out; lists that are active display with darker font to indicate which are ready to be included. Check the box next to the products to be contained within this catalog.
Adding "Tags" or a catalog "Description" are optional fields used to help understand the type of products contained within or identify the catalog through keyword search filters.
A catalog represents a Supplier. Generally, the "Catalog name" field will include the name of the company to identify and differentiate it within the public arena from other posted catalogs.
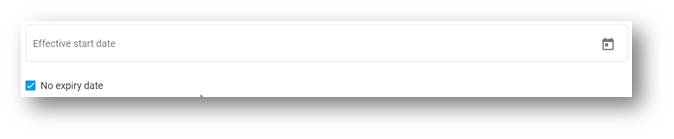
STEP 6: Select the Calendar Icon under the Effective Start Date field
STEP 7: Choose the Date to make the Catalog available for Shoppers to view or purchase against
The Effective start date is another optional field which provides the option to create the catalog first and then automatically go live. If this field is left empty, the effective start date is assumed once the catalog is considered active. If there is a deadline on these products being available, or any other type of expiration reason, deselect the "No expiry date" and provide the date.
STEP 8: Select the Save and Next button

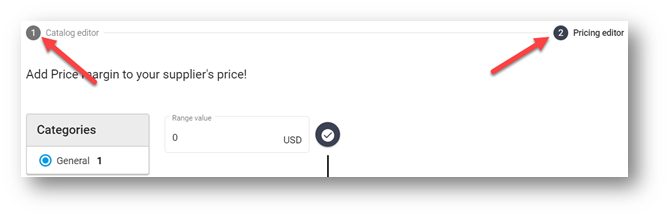
STEP 9: Add Price Margins
The “Pricing Editor” screen is not needed and defaults can be accepted. This second editing section focuses on setting a price range or assigning a percentage value adjustment, if applicable.
The top value is for the lowest dollar ($) amount (with a $0 default) and the bottom value is for the highest dollar ($) amount (with an infinite default). Changes are not necessary here, but open to provide additional details about the catalog.
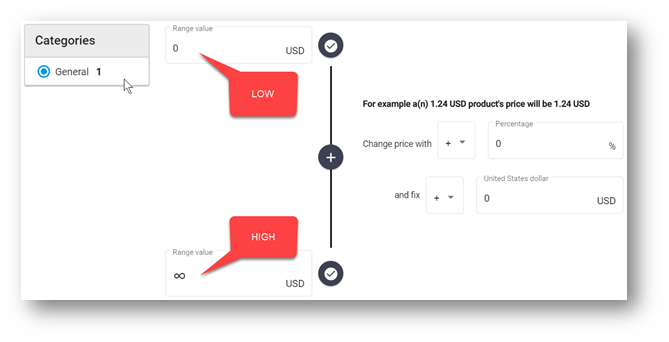
Prices mapped in the product list can be adjusted by percentages or specific dollar amounts. Changes here impact the prices only within the catalog and not the products stored in any product list. This section is available to increase or decrease those values.
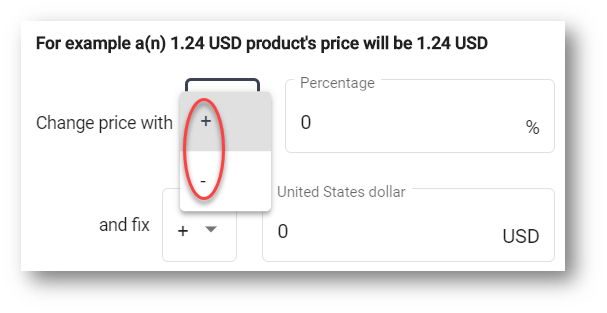
An example of how adjustments impact prices updates automatically as values are entered into either the "Percentage" or "United States dollar" fields, displayed at the top of this section. By default, no values are entered and the example confirms by stating "a(n) 1.24 USD product's price will be 1.24 USD."
For a 10% mark up, the $1.24 is adjusted by $0.124 providing a new total of $1.36.
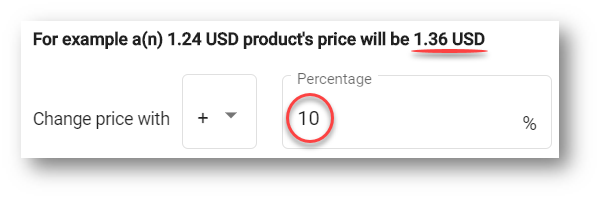
For a $10 mark up, the $1.24 is adjusted by $10 providing a new total of $11.24.
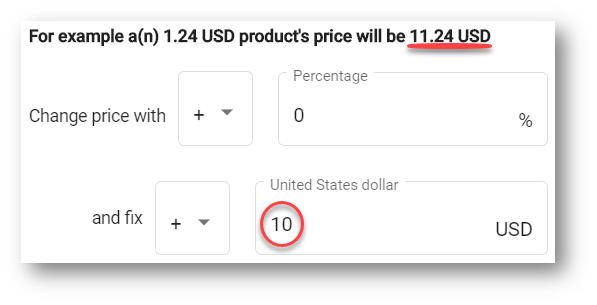
Both options can be used at the same time, with the positive (+) and negative (-) indicators.
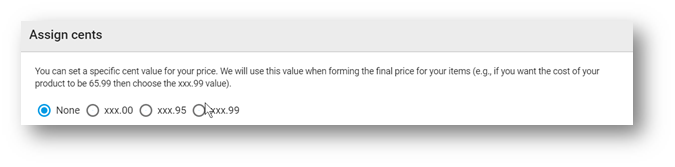
To assign a specific cent value, select the appropriate decal value. Options include None, $X.00, $X.95 and $X.99.
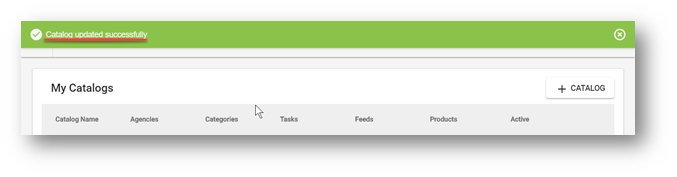
Once completed, scroll all the way down and select "Save and finish" to finalize all the information entered and return to the "My Catalogs" page. A confirmation displays at the top of the page.
At this point the Catalog is created, and the Products from the Product File are associated to it. By default, all products are available to search in the Marketplace unless the active status is turned off.
Update a Catalog
Catalog updates do not need to repeat these initial steps to keep product information in the Marketplace system. Simply return to the Catalog editing option and make the needed changes.
Once updated, the catalog doesn't need any other refresh as the entire system is able to sync up to recognize the changes.
STEP 1: Select the Catalog to Update
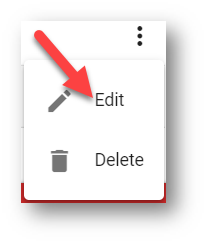
There are two ways to return into a previously created catalog. The first is completed by clicking anywhere to the left of the "Active" option (e.g. "Catalog Name", "Agencies", "Categories", "Tasks", "Feeds," "Products"). The second is available by first opening the sub-menu to the very right contained within the vertical dots.
STEP 2: Follow the Steps Outlined in 1.4.1
Opening "Edit" defaults to the last stage completed when creating a catalog. Click on either of the "number" options to return to a specific section and follow the steps as outlined earlier in this guide to make changes to the "Catalog editor" or the "Pricing editor" and click "Save and finish" again.
0 Comments